
As you might already know, Tableau Desktop (ie. the application you install on your PC) is not free, especially if you are using it within an organisation (eg. school, university or work). To use this version you need a paid licence provided by your organisation.
What if you still want to learn to use Tableau but can’t get hold of a licence? You can always opt for Tableau Public, as I have described on my previous post.
Now, what if you want to quickly create or edit a dashboard but you have no way to install Tableau Public on the computer you are using (eg. you might be using someone else’s computer and they don’t let you install any software)?
In that case you should opt for the web version of Tableau (ie. Tableau Public)! This version lets you create, edit and publish data sources and dashboards directly from your browser (eg. Chrome), without having to install any software.
Overall process to create a workbook via the Tableau Web version
Before we start creating a new workbook, it’s useful to understand how the end-to-end process works.
Today we will be working with the Tableau Web version (ie. the Tableau app that is accessed via your web browser. If you want a quick refresh on what is Tableau Web, see this post).
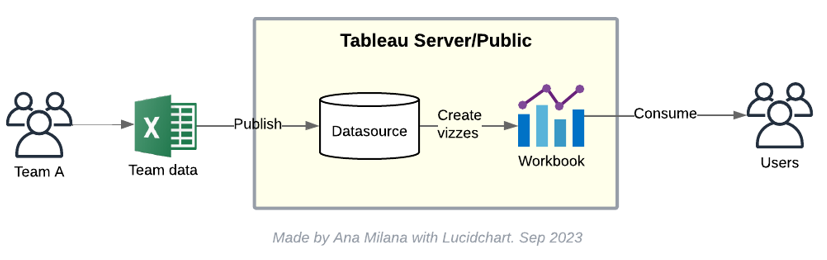
There are 2 main items that must exist on the server (aka. Tableau Public cloud) so we can create Tableau vizzes:
a) a Data Source which will store the data we will work with.
b) a Tableau workbook (“.twb file”) which is connected to the data source.
In today’s flow we will publish a given data file (eg. an excel file) to Tableau Public (aka. the server), to be used by our Tableau workbook.
The workbook and its connected data can be use to create vizzes (aka. graphs), that can be saved to the server (ie. Tableau Public) for any user to view (ie. consume).
Note: when working with Tableau Public, Publishing means that something will be saved to the server.
Creating an empty workbook and adding data to it
1. Go to the Tableau Public website and sign into your account. Note: if you haven’t created a Tableau account yet, please do so following the steps here.
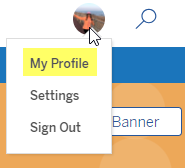
2. Navigate to your profile page (click on your Profile Image on the top right and select My Profile).
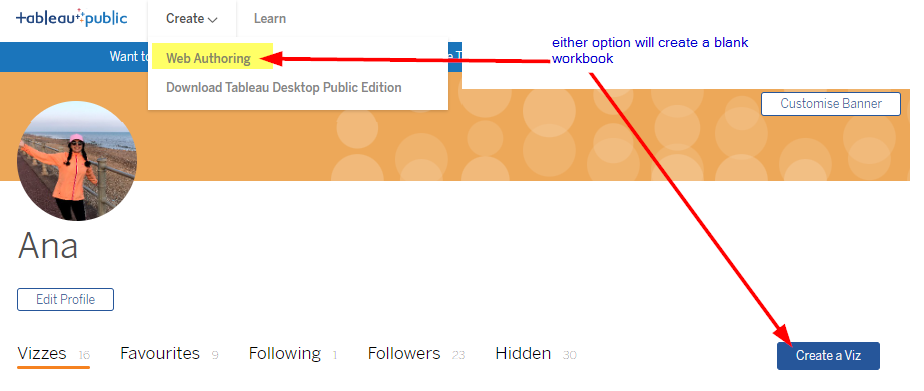
3. Create a new blank workbook by either clicking on “Create > Web Authoring” or clicking on “Create a Viz” (see below image).
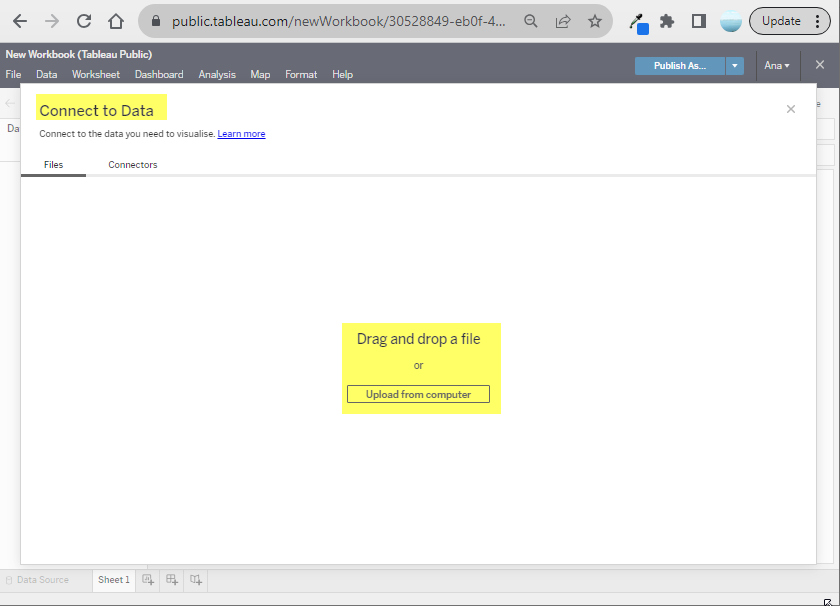
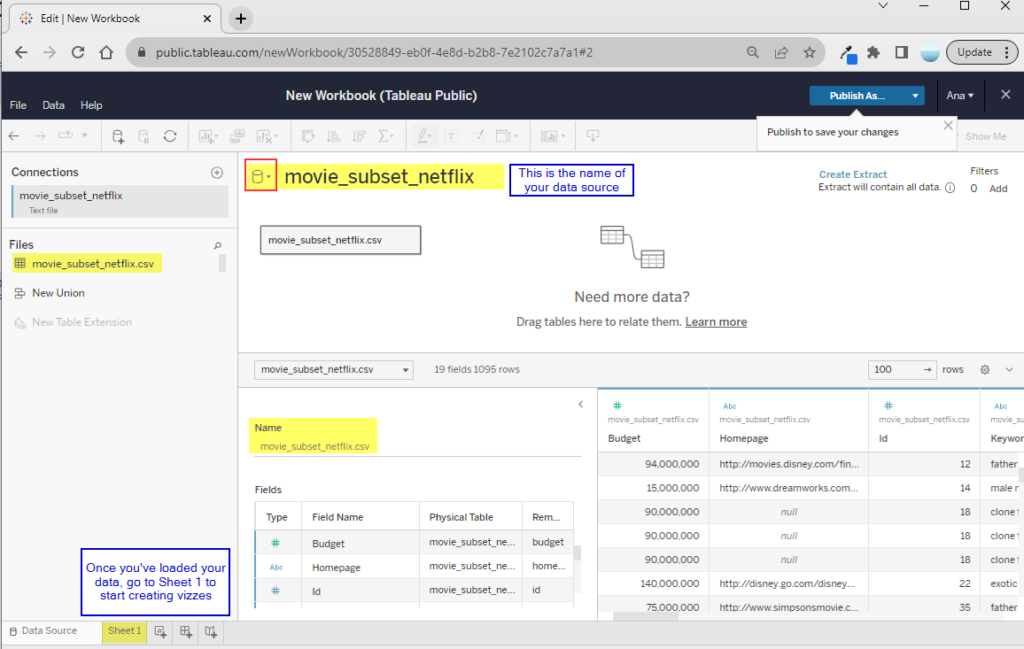
4. Once a new workbook is created, the “Connect to Data” window will pop up. Now you can choose any file from your PC to be added as a datasource.
5. Once your data file (eg. Excel) has been added as a datasource, you will see the data on the Data Source tab. You can use this screen to adjust any columns and data types where necessary.
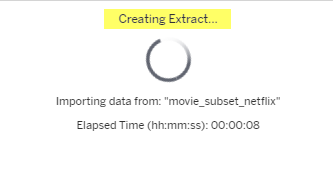
6. Once you are ready to start vizzing, click on the Sheet 1 tab. A small window will appear saying that the Data Extract is being created. This is normal, just wait for this to complete.
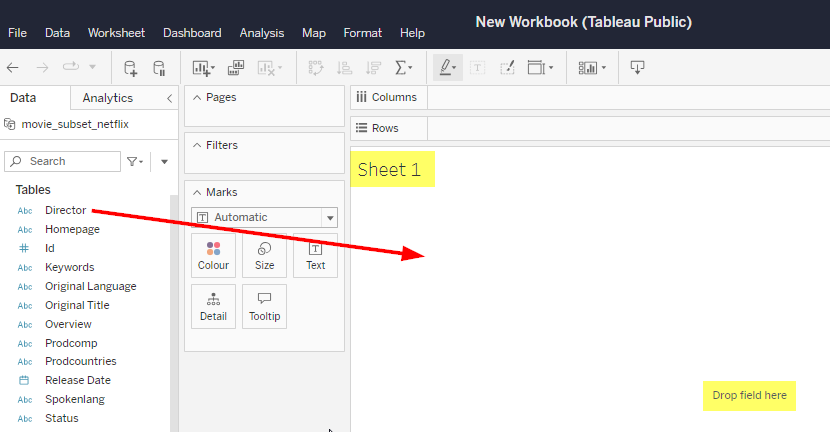
7. Once your new workbook is ready to be used, you will be taken to Sheet 1 and you will see a list of the fields available in your Data Source. Try dragging and dropping any field into the “Drop field here” area.
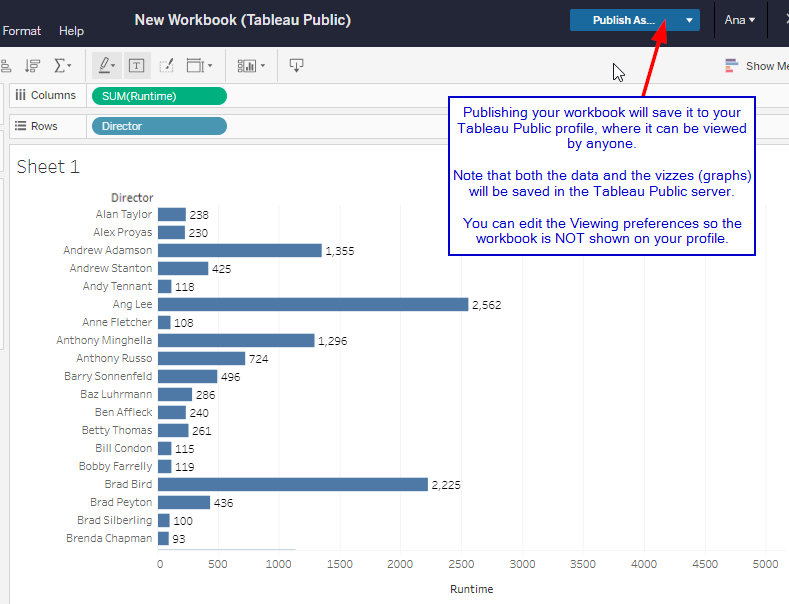
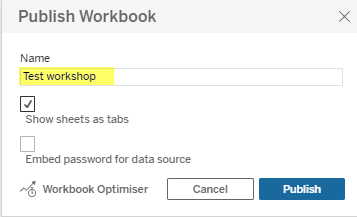
8. Play around with your new workbook and create a couple of vizzes (ie. graphs). Once you are ready to save your workbook to your Tableau Public profile, click on “Publish As…” and give it a meaningful name.
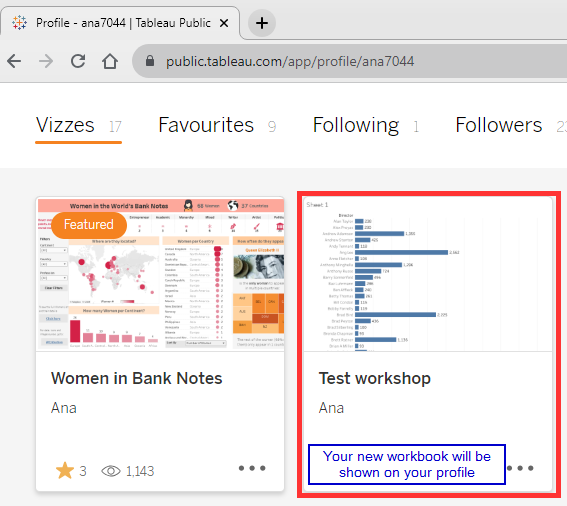
9. Once your workbook has been published, it will appear on your Tableau Public profile.
Modifying and refreshing published workbooks & data sources
Once you’ve created and published a workbook on Tableau web, you might want to modify it (eg. to add new charts).
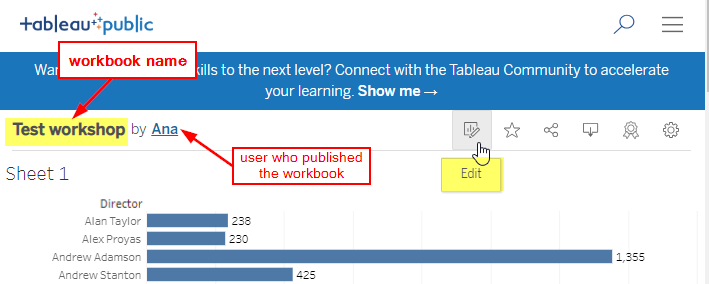
To edit your workbook, visit its page and once there click on the Edit button. You can modify your workbook through the Web version, just like when you created it. Once you are ready to save your changes, publish your workbook again (it will be published into the same URL unless you give it a new name).
If you are using Tableau as part of your organisation (eg. work), you can permission different users to edit your workbook. For example, you might have Team A creating and publishing a workbook. They can permission someone in Team B to have edit rights, so they can make changes on the workbook at any time.
This means that more than one person can collaborate on a given workbook, and this can all be done directly via the Web version (ie. without the need to get a new Tableau Desktop licence). For example, if the key Tableau person in Team A is not available, someone from Team B can still take over and make any necessary modifications to a workbook.
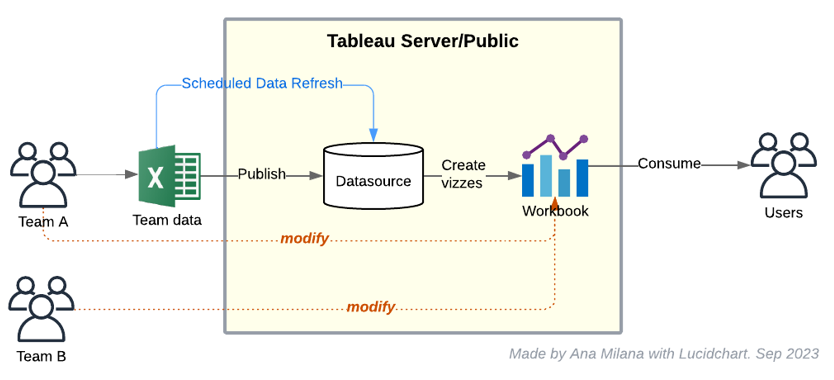
Refreshing the data
As time goes by, the data in your original data source (eg. Excel file) might change – for example, you might be gathering expenses on your Excel spreadsheet, and each week you will get new expenses added to the file.
If any data changes in the source file, it should also be reflected on your workbook, so users can always see the latest data available. Depending on how you set up your Data Source, you can set Tableau to either automatically refresh its data at specific intervals (aka. a Scheduled Data Refresh where Tableau will read a given file again, so it accesses the new data), you can ask it to refresh the data on an adhoc basis, or you can manually upload a new version of your data file.
There are more ways in which Tableau can keep its data up to date, including the use of Live connections where Tableau reads from a specific file/database in real-time (meaning that it always has the latest data). I won’t go into more detail on this but you can certainly learn more about this in any Tableau learning website.
There are more ways in which Tableau can keep its data up to date, including the use of Live connections where Tableau reads from a specific file/database in real-time (meaning that it always has the latest data). I won’t go into more detail here but you can certainly learn more about this in the main Tableau Help page!