
Last year, I really got into watercolours! I joined a beginner’s class in Madrid with the amazing Eva, where I finally learned to paint with animal-hair brushes and on cotton paper (much more versatile than pure cellulose paper, though at times, harder to control too!). I also explored a somewhat “static” form of Urban Sketching—creating sketches from photos instead of painting on location, as the proper Urban Sketchers do.
Along my journey, I tried some somewhat simple tutorials that let me play around with bold colours and cheerful vibes. I was so pleased with the results that I decided to list them out in case they can help other beginners on their watercolour journeys!
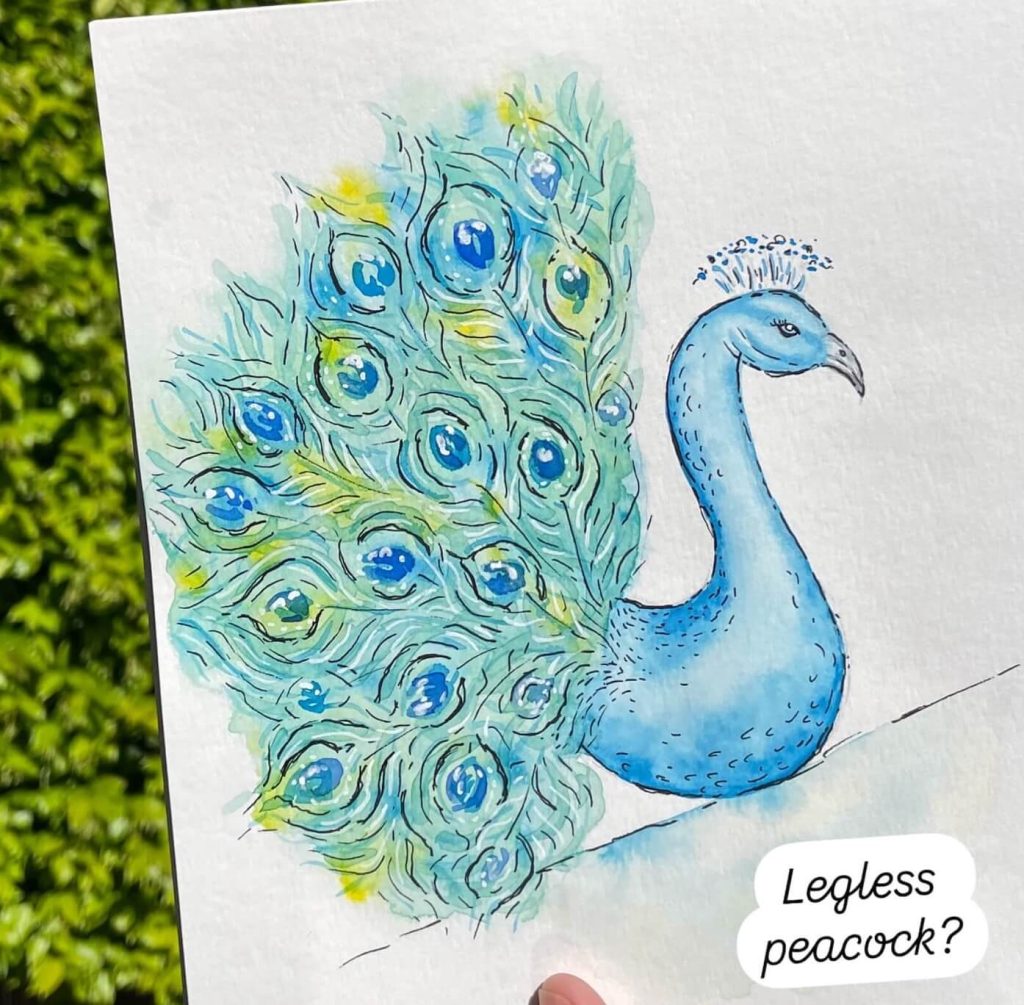
1. A colourful peacock
I followed a YouTube tutorial by @Watercoloreasy, but gave it a bit of my own spin by adding black outlines, to help make the textures and shapes stand out a bit more. Since this was a bit of a trial painting, I used Canson 100% Cellulose watercolour paper. It doesn’t absorb water as much as cotton paper does, which means faster drying and quicker results!
Tutorial: https://www.youtube.com/watch?v=4L7B5N6VPYU
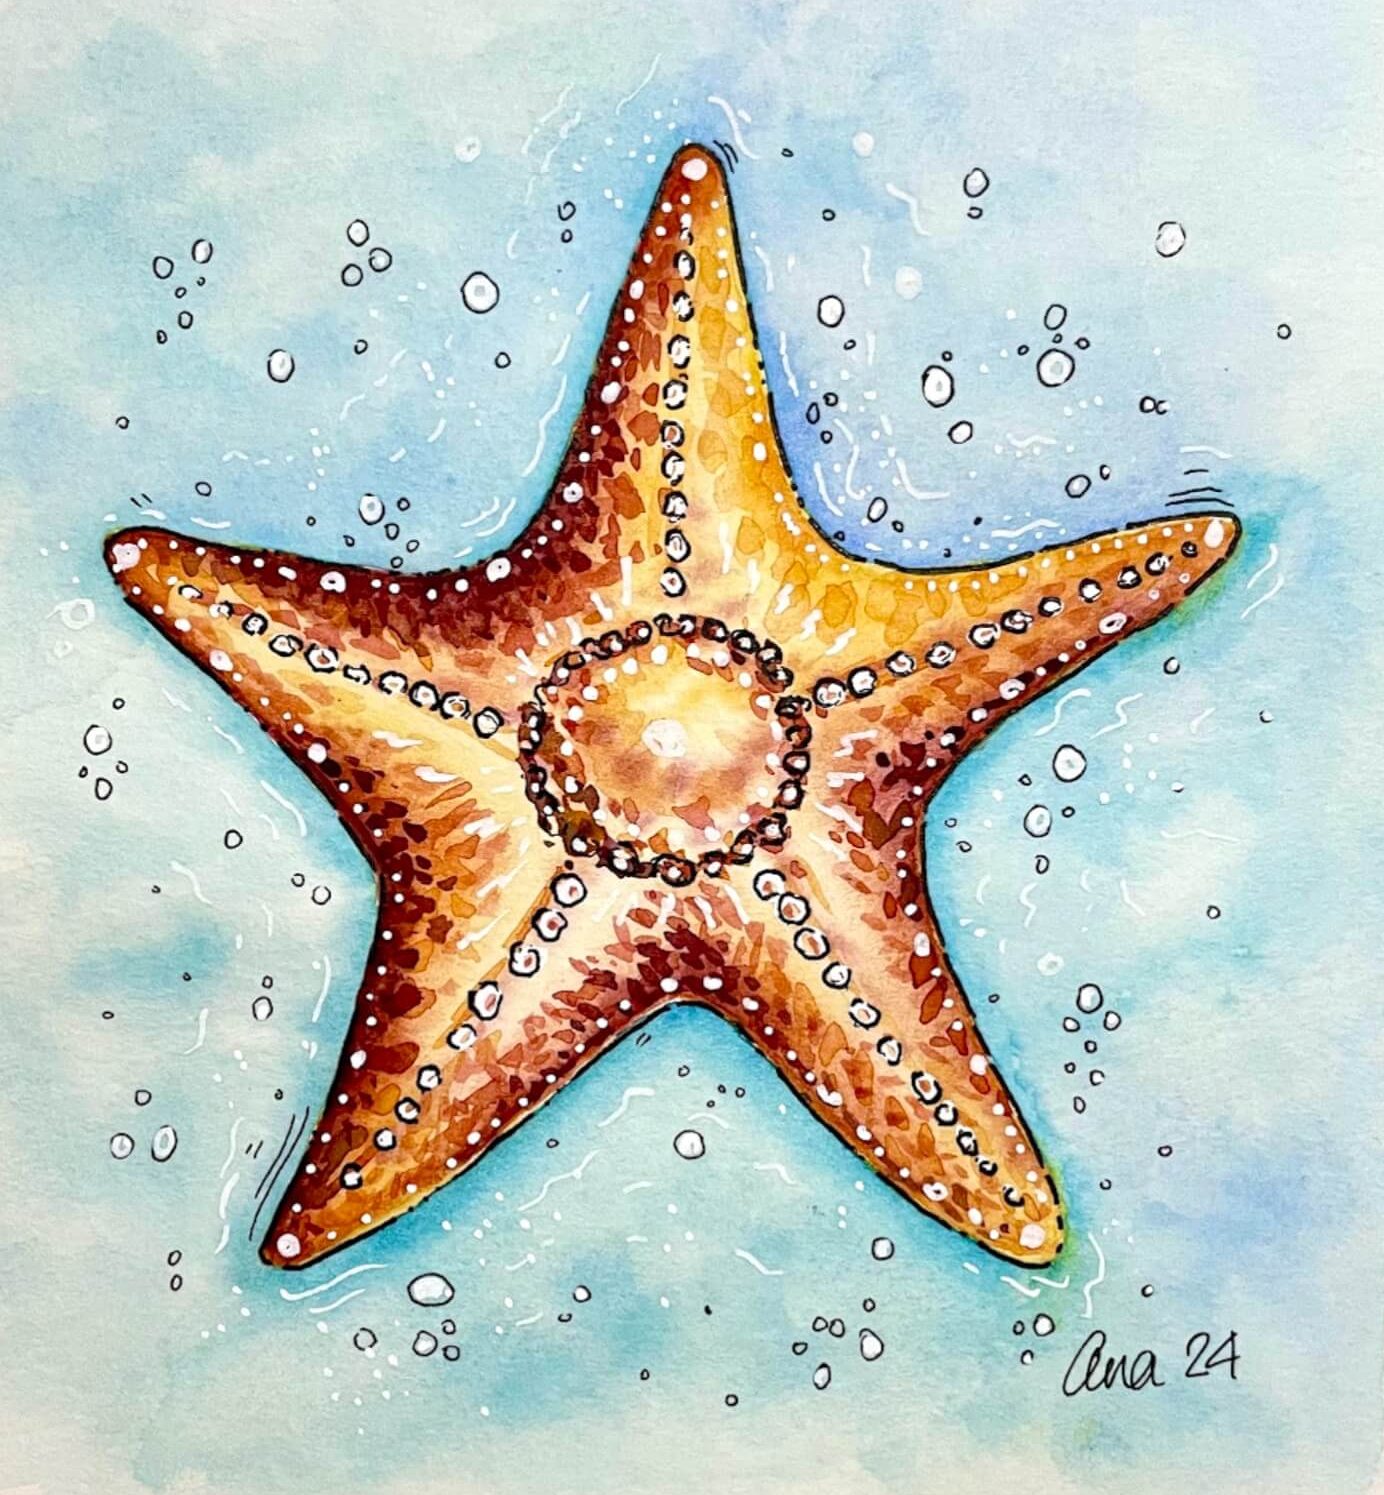
2. A summery starfish
I found a great tutorial by @hannahartandprints — her steps were super clear and walked me through every little detail, and I was pretty happy with how my starfish turned out! I added some bubbles and little waves to give the painting a bit more movement, and I also swapped the sandy background for a turquoise Caribbean sea vibe, just to make the starfish pop out a bit more.
As usual, I added black outlines, as I can’t get enough of them! I also added highlights and some extra details with a white Posca marker – check them out and play around with them if you haven’t already done so. They can be a great addition to your watercolour journey!
Tutorial: https://www.youtube.com/watch?v=8EhrYkPYvBk
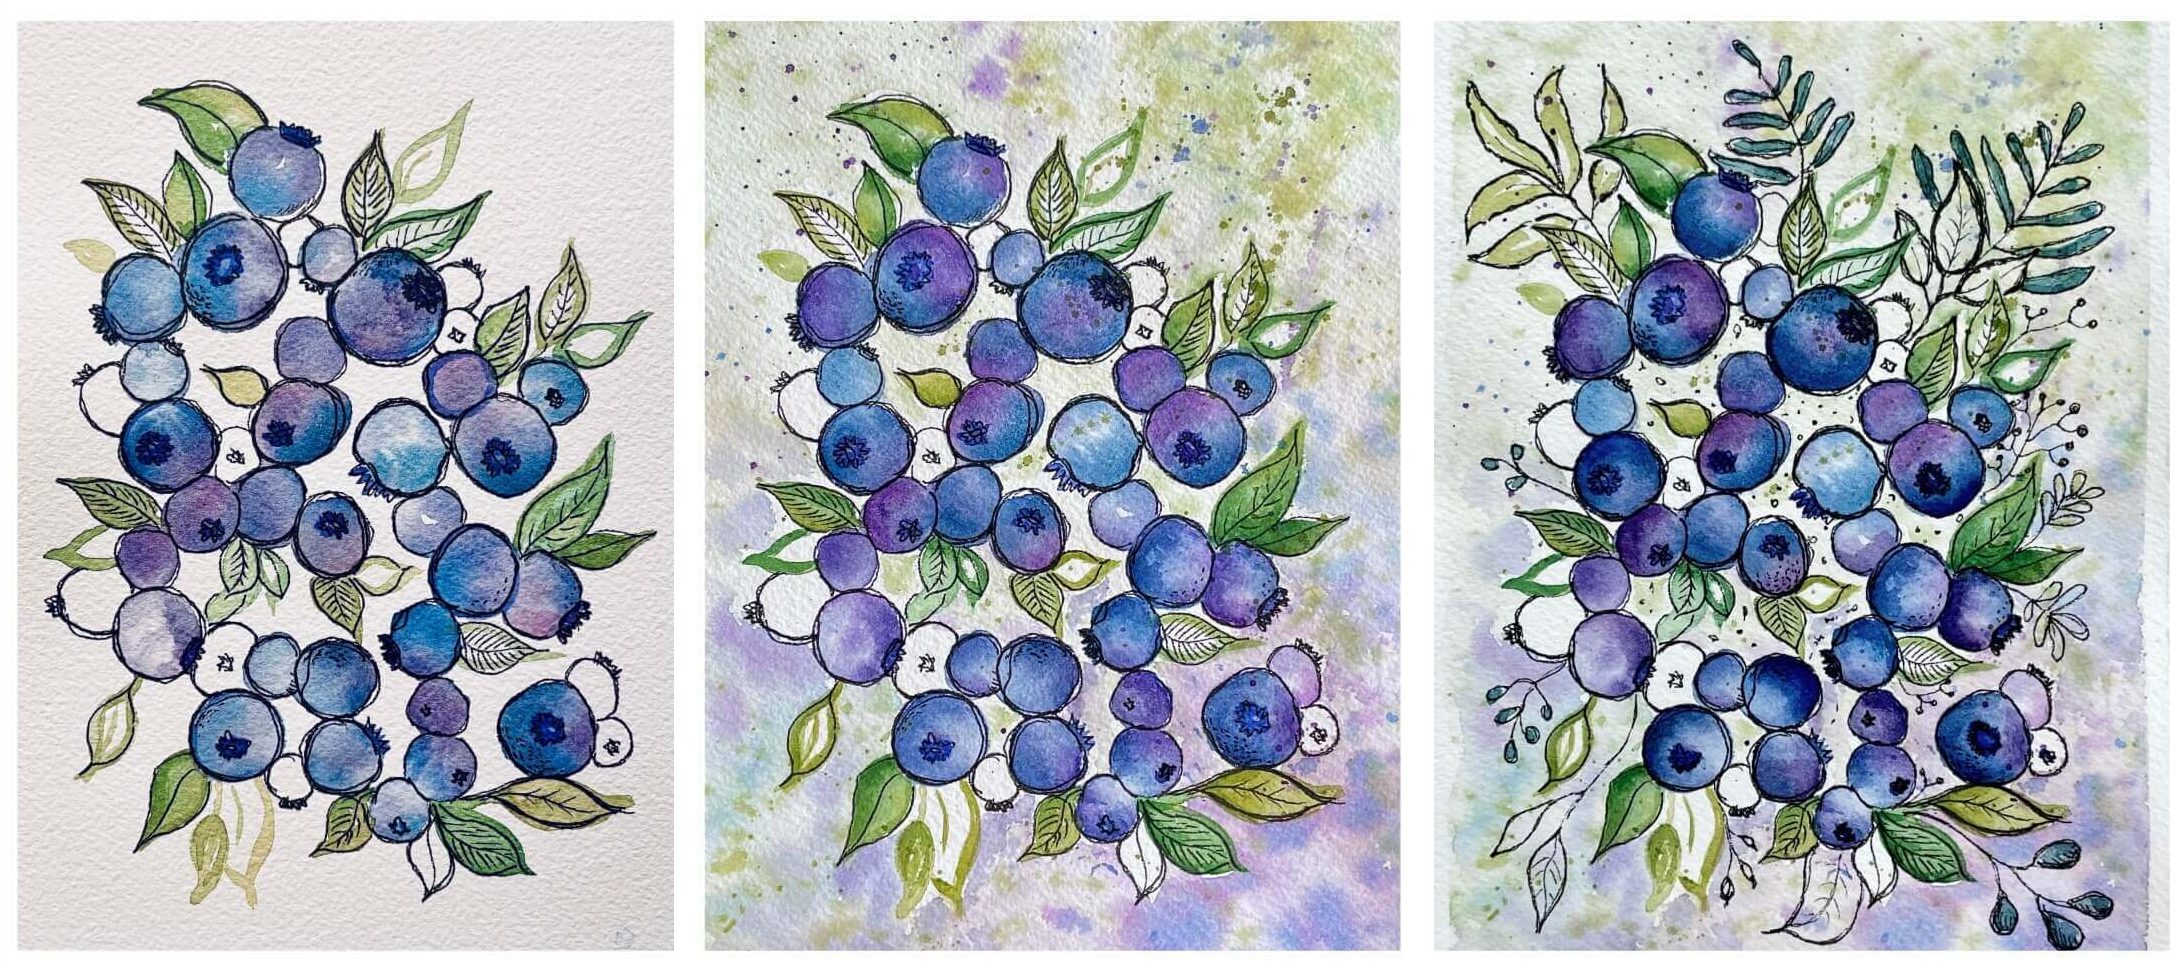
3. Some easy and loose blueberries
Andrea Nelson does some great beginner tutorials, and one of them was this blueberries one, where you can totally go off script and improvise your own blueberries however and wherever you like! It was definitely a really fun one to follow, and it’s perfect for beginners since you don’t need much watercolour technique – you’ll basically just be playing around with colour and water, letting the pigments flow and do their thing
Quick note: I was using 100% Cotton, Cold Pressed Arches paper, which helps the pigments flow more easily than cellulose paper. Also if you’re based in Spain, Artisa usually has really good price deals for this paper!
After finishing the tutorial, I decided to add a soft, diffused background, and later on, I added some extra foliage to fill in the empty spaces. You can see how the painting evolved over time as I kept layering and adding more details.
Hope you like these tutorials! Let me know if you try any of them out or if you have any fun tutorial recommendations yourself. I’m always up for trying something new!
If you’d like to connect, you can find me over on Instagram at @the_cat_illustrator – I’d love to see what you’re working on!
Disclaimer about the links in this post: I’ve added some Amazon and other store links just for reference, so you can see the exact products I used. I’m not part of any affiliate program and don’t get any financial benefit from these links.